 how-to
7 Clogged Bathroom Sink Repair Tips That Actually Work
Last Updated: November 1, 2026
Quick Summary
A clogged bathroom sink usually sits in one of three spots: the pop-up stopper, the drain opening, or the P-trap. Fill the sink about three inches with water and pull the stopper to see how fast it drains and where the blockage likely sits. Matching the fix to that spot saves time and avoids pouring chemicals into the wrong place.
- Fill the sink about three inches with water, then pull the stopper and watch how fast it drains.
- Gurgling sounds usually mean air is trapped behind a clog in the drain line.
- Run the hottest tap water for two to three minutes to clear soap scum and grease buildup.
- Use a cup plunger and block the overflow hole with a damp cloth to keep pressure building.
- If the trap is clean but the sink still backs up, the clog is past the trap and needs a drain snake.
Table of Contents
- How to Remove a Bathroom Sink Stopper for Easier Access
- Natural Ways to Unclog a Bathroom Sink Before Reaching for Tools
- How to Use a Plunger on a Bathroom Sink Correctly
- How to Clean a Bathroom Sink P-Trap Step by Step
- Chemical Drain Cleaners, Mixed Products and Safety Precautions
- When to Stop DIY and Schedule a Professional Repair Visit
- Frequently Asked Questions
A clogged bathroom sink repair usually starts with one question: where is the blockage? Finding the right spot saves time and keeps you from pouring chemicals into the wrong place. U.S. Environmental Protection Agency guidance on household drain products
Start with a simple test. Fill the sink about three inches with water, then pull the stopper and watch how fast it drains.
Look for these clues:
- Slow drain only: Hair and soap buildup near the stopper.
- Gurgling sounds: Air trapped behind a clog in the drain line.
- Water backing up when you run another faucet: A clog past the P-trap or in the main line.
- Smell: Trapped gunk under the sink, often in the P-trap.
Older homes often have pipes that have narrowed over decades of buildup, so a slow sink there may point to a bigger problem. Common Plumbing Issues in Older Homes explains what to watch for in these systems.
How to Remove a Bathroom Sink Stopper for Easier Access
Removing the stopper gives you direct access to the hair and soap that cause most bathroom clogs. Many stoppers pull out or twist off by hand.
Here is the basic process:
- Pull the stopper straight up if it lifts out.
- If it does not lift, twist it counterclockwise a quarter turn.
- For pivot-rod stoppers, unscrew the nut under the sink that holds the rod.
- Pull out any hair wrapped around the stopper shaft.
- Rinse the stopper and set it aside on a towel.
Watch out: pulling hard on a stuck stopper can crack the plastic or loosen the pivot rod. Wiggle it gently first.
Once the stopper is out, look down the drain opening with a flashlight. Hair often sits just below the opening, where a pull-out tool can grab it.
Natural Ways to Unclog a Bathroom Sink Before Reaching for Tools
Natural methods are a reasonable first move, but they are not interchangeable. Each one works on a different kind of clog, and using the wrong one wastes time and can make the blockage worse.
Match the method to the clog:
- Soap scum and grease film: hot water flush.
- Light hair and product residue near the stopper: baking soda and vinegar, after removing the stopper.
- A solid hair mass or standing water that will not budge: skip natural methods and go straight to a tool.
Hot water flush: Run the hottest water your tap produces for two to three minutes. This melts and carries away soap scum and grease that coat the pipe walls. It does not dissolve hair. Do not use boiling water on PVC pipes, since it can soften the joints and distort the trap.
Baking soda and vinegar:
- Remove the stopper first so the mixture reaches the clog instead of sitting on top of it.
- Pour half a cup of baking soda down the drain.
- Follow with half a cup of white vinegar.
- Cover the drain for 15 minutes so the fizzing works into the buildup.
- Flush with hot tap water for one minute.
The fizzing is a mechanical agitation, not a solvent. It loosens soft residue clinging to the pipe walls, which is why it helps with light buildup and does almost nothing against a solid hair mass.
Limits of natural methods: Repeated use can leave residue, and results vary by how much buildup is present. If the sink still drains slowly after two tries, stop and move on to a plunger or a hair-removal tool. Continuing to pour mixtures into a clogged drain just adds volume you will have to deal with when you open the trap.
How to Use a Plunger on a Bathroom Sink Correctly
A plunger works by pushing and pulling water to break up a clog. It works best on sinks, but only if you seal the opening properly.
Follow these steps:
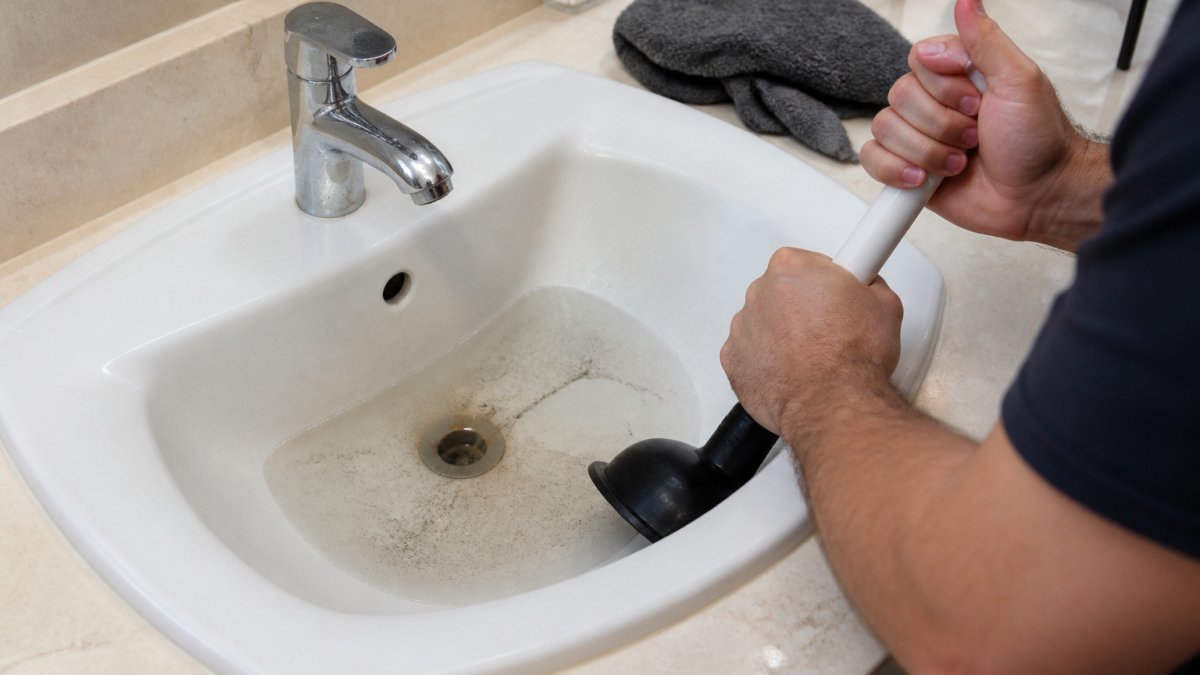
- Fill the sink with enough water to cover the plunger cup.
- Block the overflow hole with a damp cloth. This keeps air from escaping and lets pressure build.
- Place the cup over the drain and press down firmly.
- Pump up and down 10 to 15 times without breaking the seal.
- Lift the plunger quickly and check whether the water drains.
Use a cup plunger, not a flange plunger. The flat cup fits the round sink opening better and seals more tightly.
Watch out: never use a plunger right after pouring a chemical drain cleaner. Splashing chemicals can burn your skin or eyes.
How to Clean a Bathroom Sink P-Trap Step by Step
The P-trap is the curved pipe under the sink. When you open the trap, you learn whether the blockage is in the trap itself or farther down the line. International Association of Plumbing and Mechanical Officials, drain trap standards
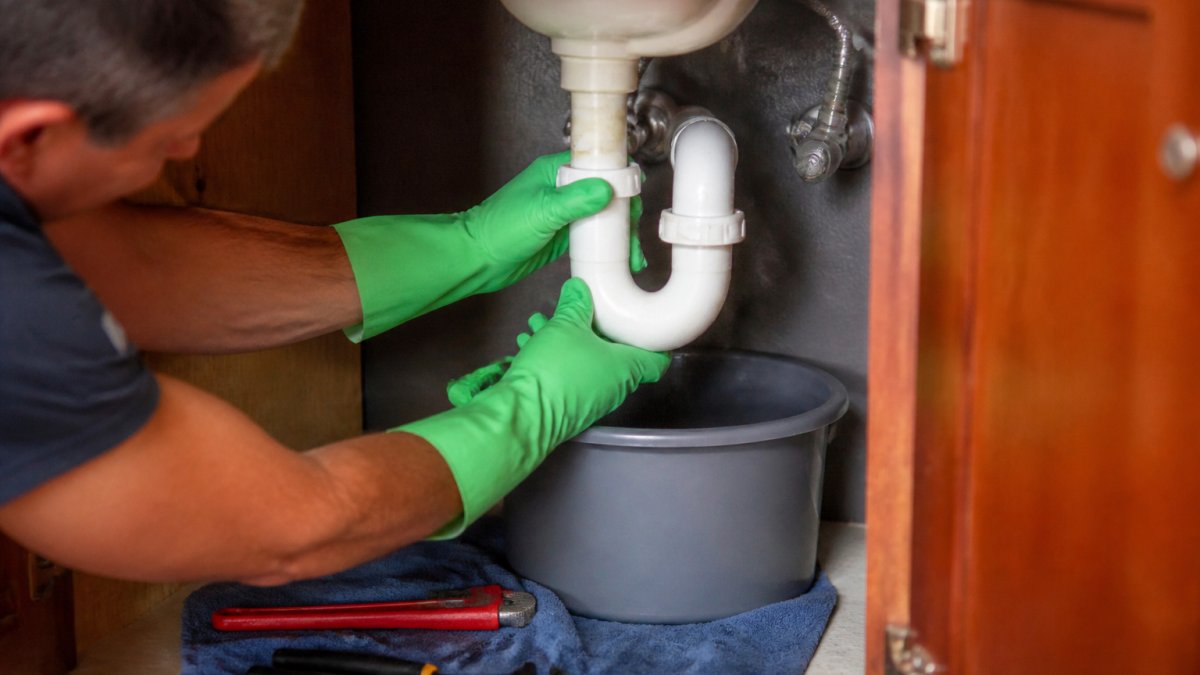
!Close-up of hands in rubber gloves loosening a white PVC P-trap under a bathroom sink beside a plastic bucket and towel
What you will need:
- A bucket
- Rubber gloves
- Towels
- An adjustable wrench or pliers
- A small brush or old toothbrush
- A flashlight
Steps:
- Place the bucket under the trap. Some water will spill out, so keep a towel under the bucket.
- Loosen the slip nuts on both ends of the trap by turning them counterclockwise. Hand-tighten is often enough; if a nut is stuck, hold the pipe steady so you do not twist the drain assembly.
- Remove the trap and empty it into the bucket. Look inside: hair and soap sludge in the bend means the clog was in the trap.
- Scrub the inside with the brush and rinse with hot water.
- Check the pipe openings on the wall and in the sink tailpiece with a flashlight. If the trap was clean but the sink still backs up, the clog is past the trap in the branch line, that is the point to reach for a drain snake rather than reassembling and hoping.
- Reattach the trap, hand-tighten the nuts, then add a quarter turn with pliers. Make sure the beveled washers sit in the right direction; a washer installed backward is the most common cause of a leak after reassembly.
- Run water for a minute and check for leaks at both slip nuts. Dry the joints with a towel first so a slow weep is visible.
If you see a leak after reassembling, tighten the nuts slightly more. Do not overtighten plastic fittings, since they can crack. If a joint still weeps, remove the nut and check that the washer is seated and not cross-threaded.
The steps below summarise the P-trap cleaning process, along with the check to run if the sink still backs up afterwards.
| Step | What to do | Note |
|---|---|---|
| Place bucket | Set bucket and towel under trap | Some water will spill out |
| Loosen nuts | Turn slip nuts counterclockwise | Hand-tighten is often enough |
| Empty trap | Remove trap and empty into bucket | Hair and soap sludge means trap clog |
| Scrub and rinse | Brush inside, rinse with hot water | Use a small brush or old toothbrush |
| Check beyond trap | Inspect pipe openings with flashlight | Clean trap but still backed up means branch line clog |
| Reattach | Hand-tighten, then add a quarter turn | Check beveled washer direction |
| Test for leaks | Run water for a minute | Dry joints first so a slow weep shows |
Chemical Drain Cleaners, Mixed Products and Safety Precautions
Chemical drain cleaners work fast, but they carry real risks. Read the label before you use one, and never mix products.
Key safety rules:
- Never mix drain cleaners with other cleaners, especially bleach and acidic products. Mixing can release toxic gases.
- Wear gloves and eye protection when handling any chemical.
- Keep the room ventilated. Open a window or run the fan.
- Do not reuse the chemical after a failed attempt. Let it sit as directed, then flush.
- Store products out of reach of children and pets.
Chemical cleaners also damage old pipes over time, and they can make a later plumber's job harder. If you have used one and the clog remains, tell the technician what you used before they open the line. U.S. Consumer Product Safety Commission on household chemical safety
When to Stop DIY and Schedule a Professional Repair Visit
Some clogs are beyond a quick fix. Call a professional if you notice any of these:
- Water backs up into other fixtures, such as a tub or shower.
- Multiple drains in the home drain slowly at once.
- A plunger, snake, and cleaning the trap all fail.
- You smell sewage or see water rising in low fixtures.
- Your home has older galvanized or cast-iron pipes.
When you call a professional, expect to describe which drains are slow and when the problem started.
Pricing depends on the clog's location, access, and whether parts are needed.
FAQ
Is baking soda and vinegar safe for pipes? Yes, it is generally safe for most household pipes.
Can I use a drain snake on a bathroom sink? Yes. A hand-held drain snake or hair-removal tool can reach hair and soap buildup past the stopper.
Frequently Asked Questions
How can I unclog a badly clogged bathroom sink?
Start by removing the stopper and clearing visible hair with a hair-removal tool. Then plunge with a cup plunger, sealing the overflow opening with a wet cloth so pressure builds in the drain. If water still stands after several minutes of plunging, remove and clean the P-trap underneath. A severe clog that returns after these steps usually sits deeper in the line, and that is the point where a licensed plumber should take over.
Can I use a plunger on a bathroom sink?
Yes, a cup plunger works well on most bathroom sinks. Fill the basin enough to cover the plunger cup, cover the overflow hole with a damp rag, and use firm, quick strokes for about 20 seconds before pulling up sharply. Repeat several times. Use a cup plunger rather than a flange plunger, which is designed for toilets, and avoid chemical drain cleaners right before plunging.
Why shouldn't you use baking soda and vinegar to unclog a drain?
Baking soda and vinegar fizz but rarely clear a real blockage, because the reaction is too mild to dissolve hair or soap buildup. The mixture is also easy to trap in the drain where it cannot reach the clog. If it fails, do not follow it immediately with chemical drain cleaner, since leftover residue can react unpredictably. Hot water, a plunger or a drain snake is a more reliable first step.
When should I call a plumber for a clogged bathroom sink?
Call a plumber if the sink still drains slowly after you have cleared the stopper, plunged and cleaned the P-trap, if water backs up into other fixtures, if you notice gurgling in nearby drains, or if you have already used chemical cleaner and the drain remains blocked. Those signs usually point to a clog in the main line or a venting problem, which requires professional equipment.